
Disclaimer: This post may contain Amazon affiliate links. Sudachi earns a small percentage from qualifying purchases at no extra cost to you. See disclaimer for more info.
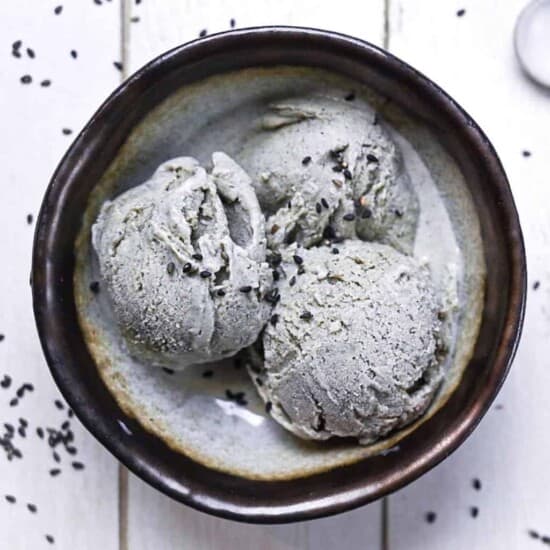
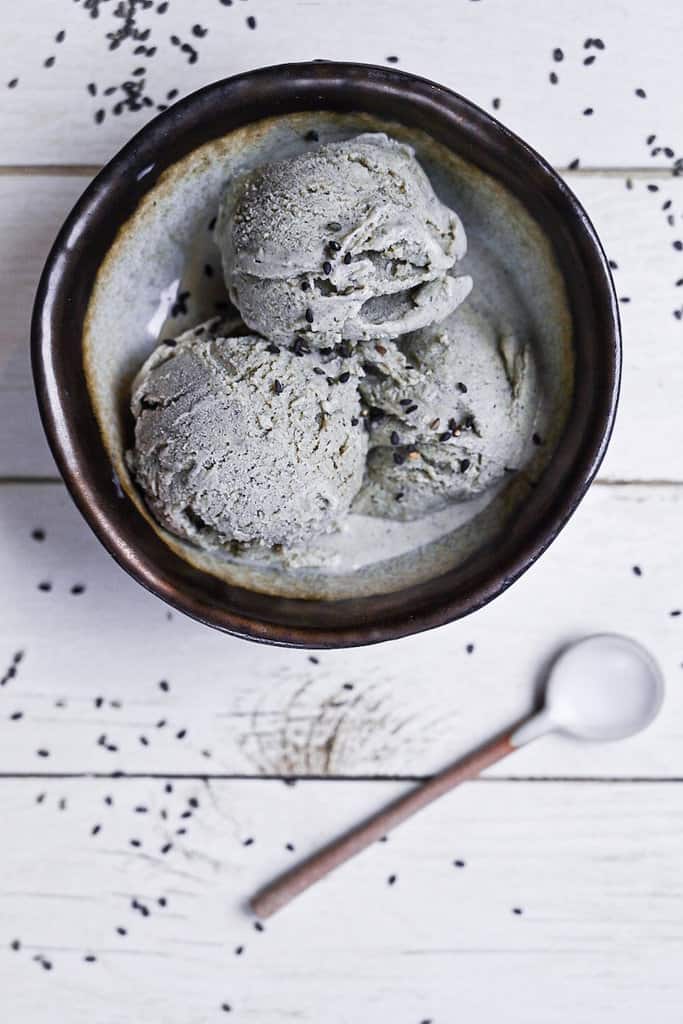
What is Black Sesame Ice Cream?
Ice cream comes in all different flavors, but few compare to the rich and nutty flavor of black sesame. Although it is not so common in the West, desserts and drinks flavored with black sesame (kurogoma) are hugely popular in Japan.
So what does black sesame taste like? When compared with white sesame seeds, black sesame seeds have a stronger nutty taste and slight bitterness that comes from the outer skin known as the “hull”. In addition to their rich flavor, they also add a unique greyish-brown color to the dishes in which they are incorporated.
Black sesame seeds are usually toasted, ground into a sweetened paste and then incorporated into sweets and beverages such as:
- Black sesame latte
- Black sesame ice cream
- Black sesame purin (pudding)
- Black sesame mochi
This recipe is a must-try for all lovers of sesame!
Ingredients & Substitution Ideas
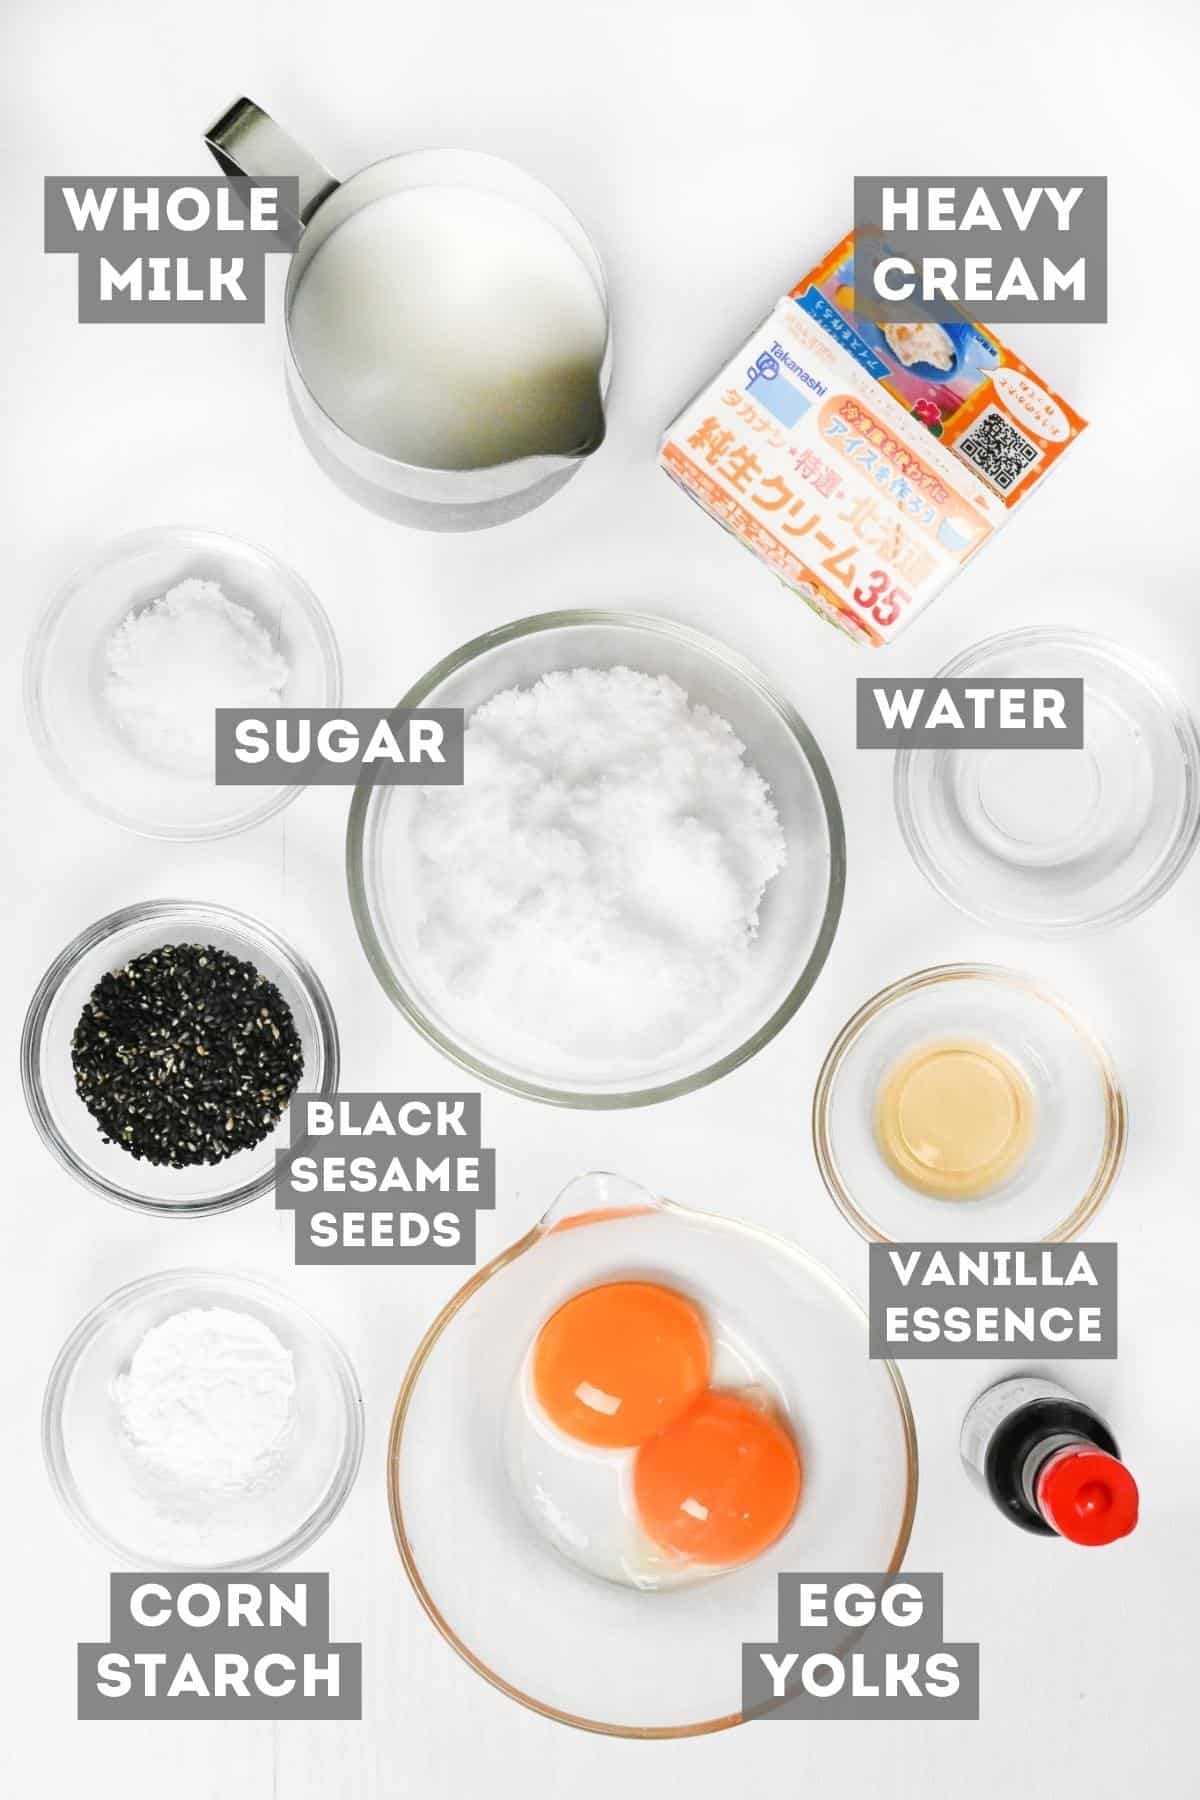
To make this homemade black sesame ice cream recipe, you will need the following ingredients:
- Black sesame seeds – to make this recipe more accessible, I stick to using regular black sesame seeds. However if you have access to “nerigoma” (Japanese black sesame paste), you can use that instead to save some time.
- Sugar – I use regular white caster sugar to add sweetness to the homemade sesame paste and ice cream itself. Sugar also lowers the freezing point of water, making it a crucial ingredient to ensure smooth, scoopable ice cream. Reducing the sugar can result in hard ice cream.
- Hot water – For melting the sugar and making the black sesame paste.
- Whole milk and heavy cream – These combined result in a rich and creamy texture. I don’t recommend using low fat milk in this recipe, and the cream should contain at least 35% milk fat. Alternatively, you can use half and half.
- Vanilla essence – A small amount of vanilla essence really compliments the flavor of the black sesame. If using vanilla extract, half the amount.
- Egg yolks – The addition of egg yolks makes this ice cream extra rich, thick and creamy. It also prevents the ice cream from becoming too solid when frozen.
- Cornstarch – Adding cornstarch not only thickens the ice cream, but it prevents ice crystals forming which helps create a smoother texture.
- Ice – Optional for speeding up the cooling time.
Visual Walkthrough & Tips
Here are my step-by-step instructions for how to make Black Sesame Ice Cream from scratch. For ingredient quantities and simplified instructions, scroll down for the Printable Recipe Card below.
How to Make Black Sesame Paste
In Japan, it’s easy to find a roasted black sesame paste called “nerigoma”. This paste can be used in desserts, drinks or even on toast! You can also purchase it here on Amazon.
However it’s easy to make your own sweet black sesame paste, you just need to follow these simple steps!

One of the key features of black sesame paste is the fact that the sesame seeds are toasted before they’re put into desserts. This helps extract the flavour and gives them an earthy and more intense nutty flavour that works perfectly in sweets.
To toast sesame seeds, you don’t need any special tools. Just a dry frying pan, a stove and a few minutes are all you need for perfectly toasted sesame seeds.
Because the sesame seeds are black, it can be difficult to tell whether they are burning or not. I recommend keeping the heat low, move the seeds continuously (either by shaking or stirring) and take them off the heat after a few minutes or when you start to smell the sesame aroma.
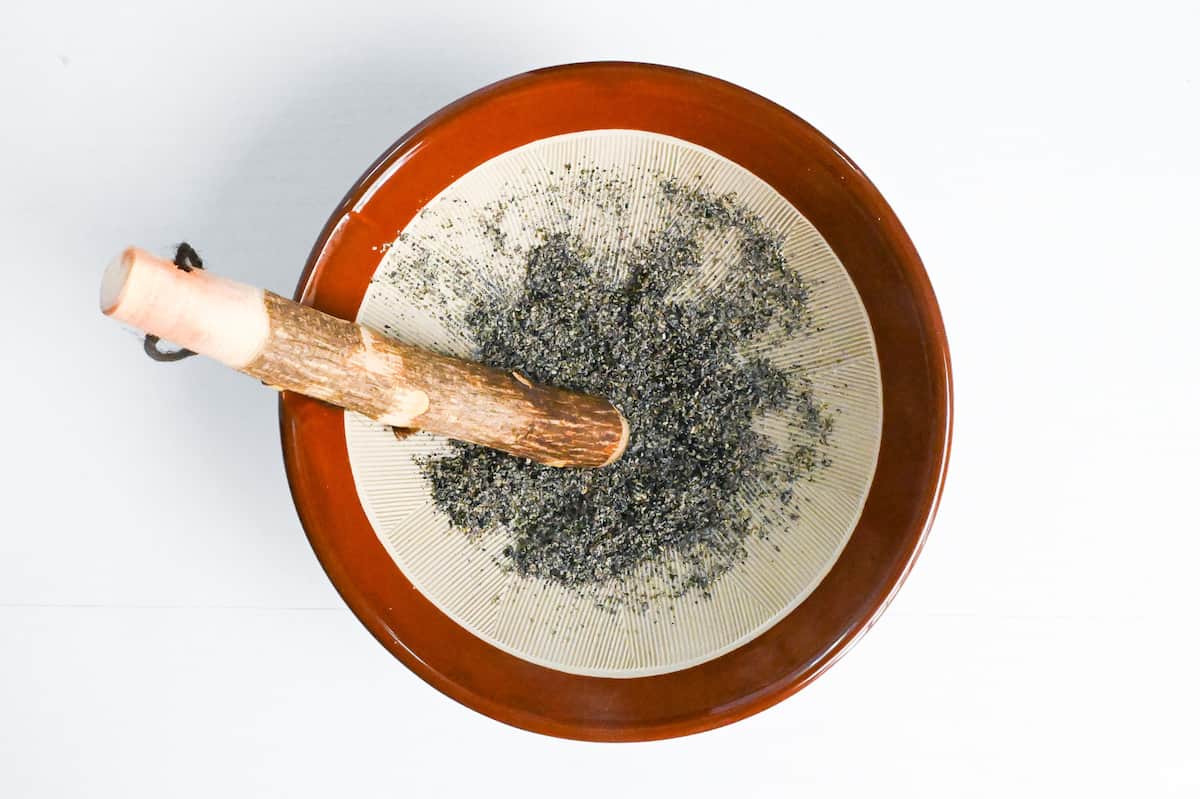
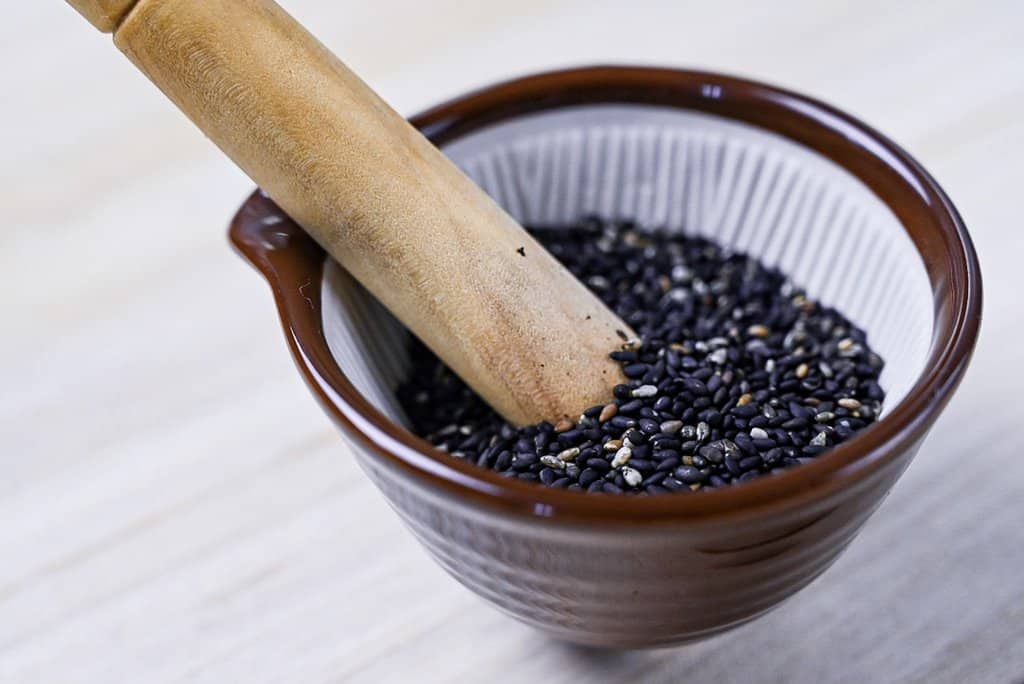
Grinding the toasted black sesame seeds not only makes them finer and easier to incorporate into your desserts, but it also helps release more sesame flavor into whatever you’re making.
The method of grinding usually depends on how much sesame paste I want to make. If you want to make a small amount for one recipe, I recommend using a mortar and pestle or a small spice grinder. If you want to make a large batch you can use a food processor.
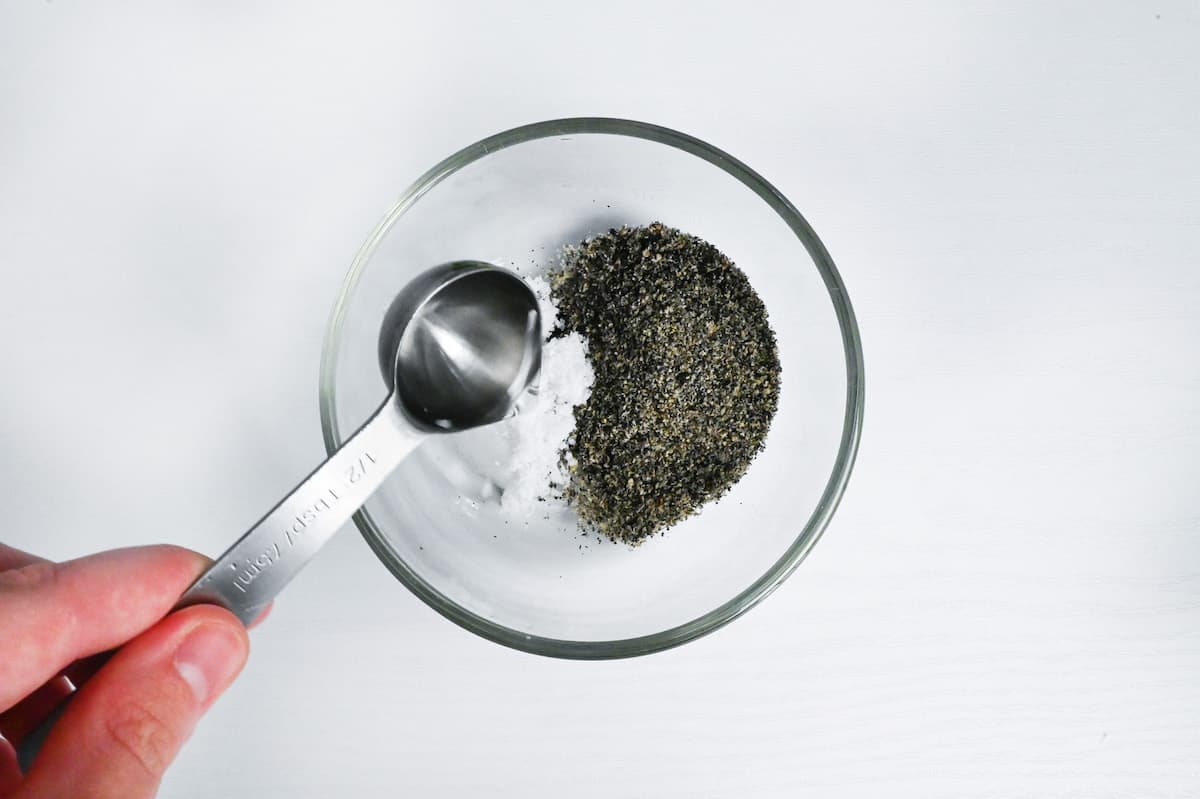
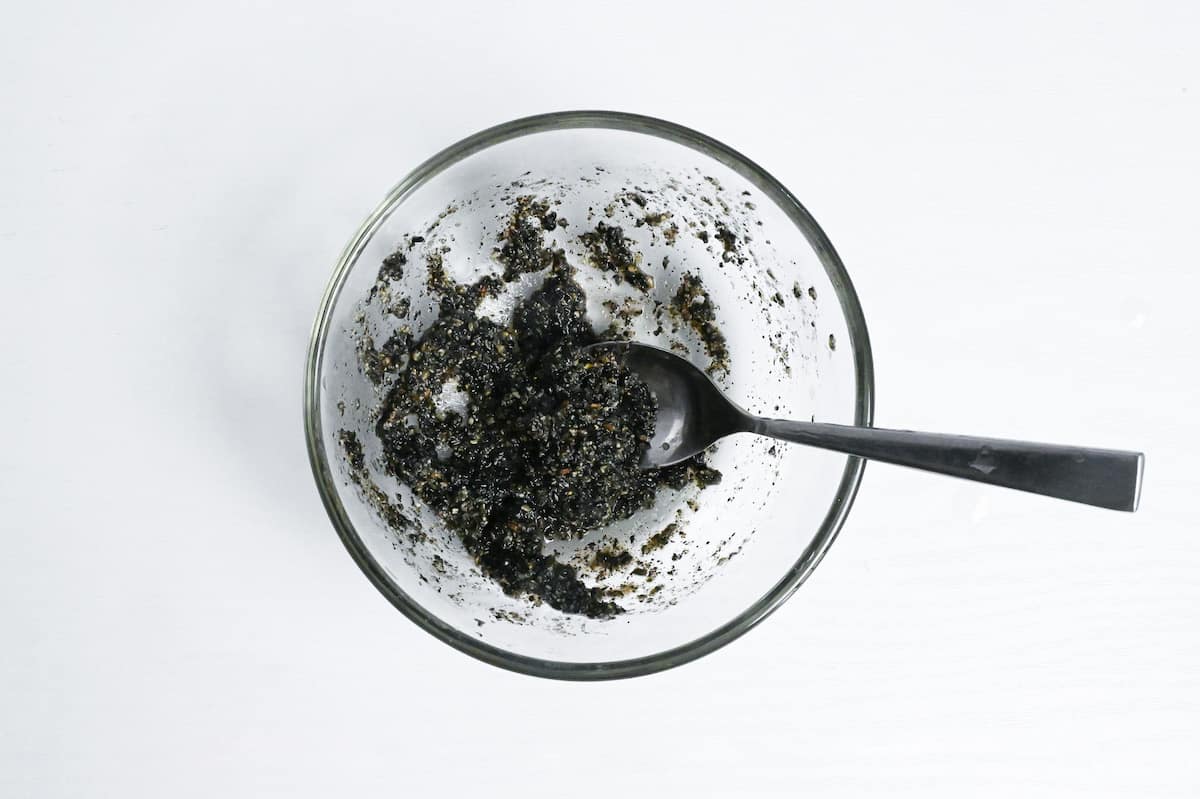
To make a simple black sesame paste, mix the ground sesame seeds with equal amounts of sugar and hot water, then mix until smooth.
To allow the sesame flavor to shine on its own, I try to avoid using sweeteners like honey or maple syrup, however you can use them if you prefer.
This black sesame paste is now ready to be incorporated into your homemade ice cream!
How to Make Homemade Black Sesame Ice Cream (Without an Ice Cream Maker)
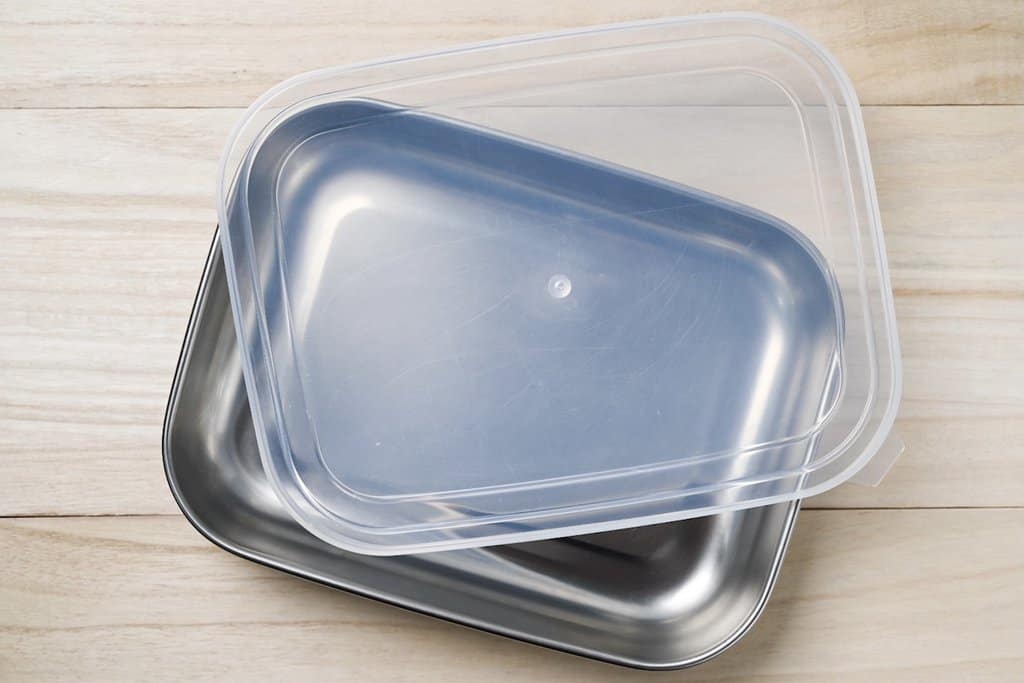
Before you start, place a wide storage container in the freezer. I recommend metal containers since they conduct heat/cold better.
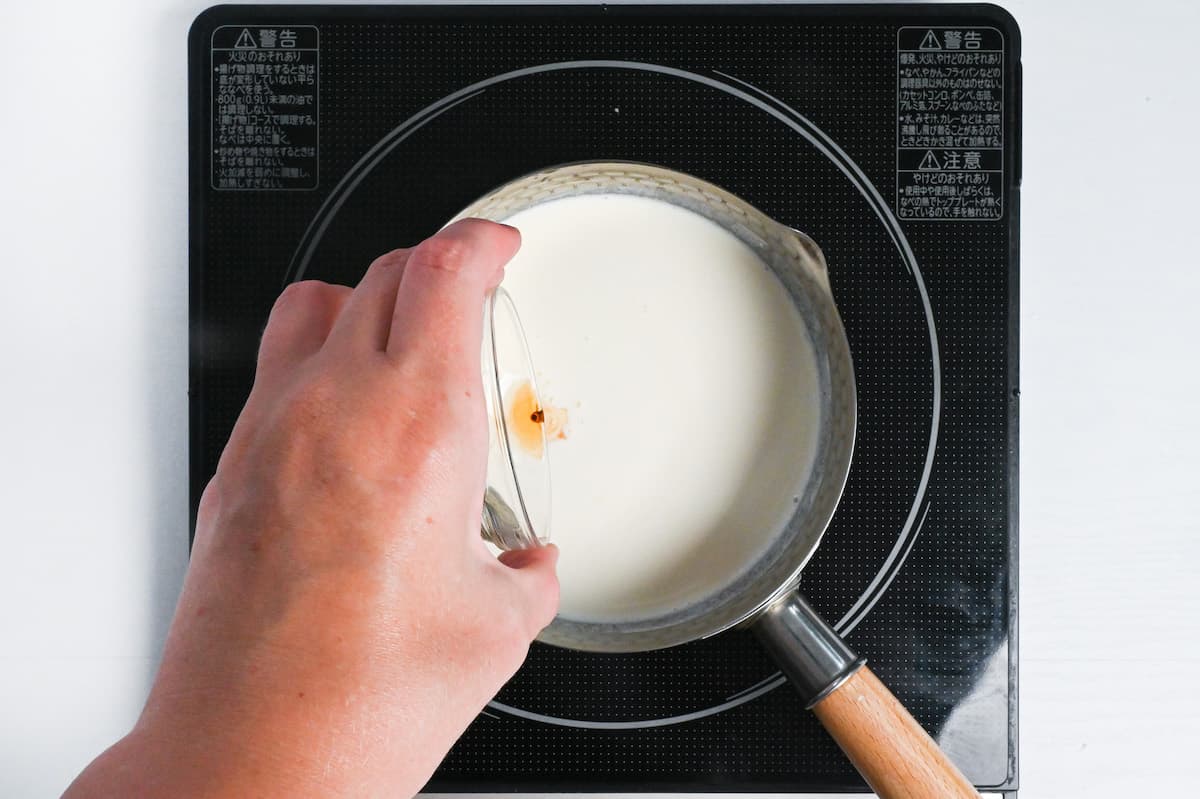
Add the milk, cream and vanilla essence to a sauce pan.
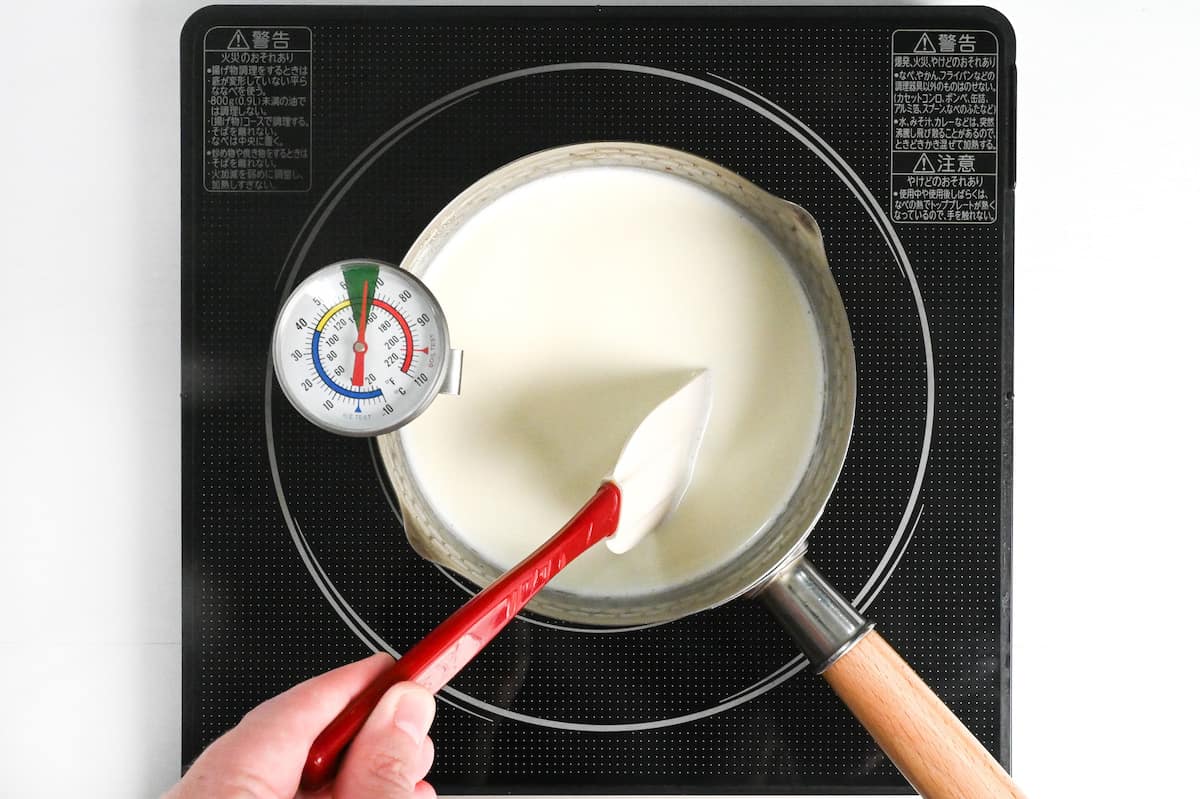
Heat the milk and cream in a sauce pan over a low to medium-low heat until tiny bubbles appear around the edges. The best temperature is around 60-70°C or (140-158°F), any higher than this will scold the milk and could lead to splitting or curdling.
I use a milk thermometer, but if you don’t have one just look out for the small bubbles around the edge and make sure not to let it boil.
Once heated, remove it from the stove and mix occasionally to stop a skin forming on top.
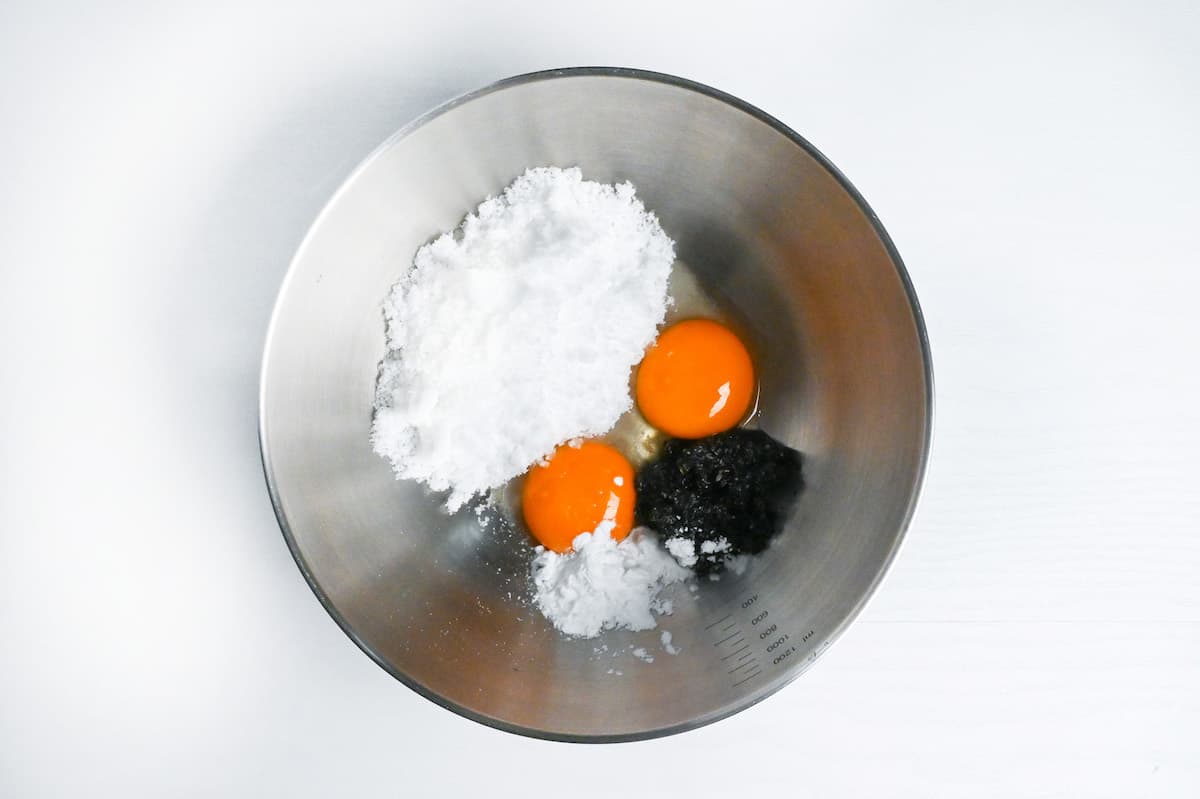
Add the egg yolks, sugar, corn starch and black sesame paste to a heatproof bowl and whisk until pale and smooth.
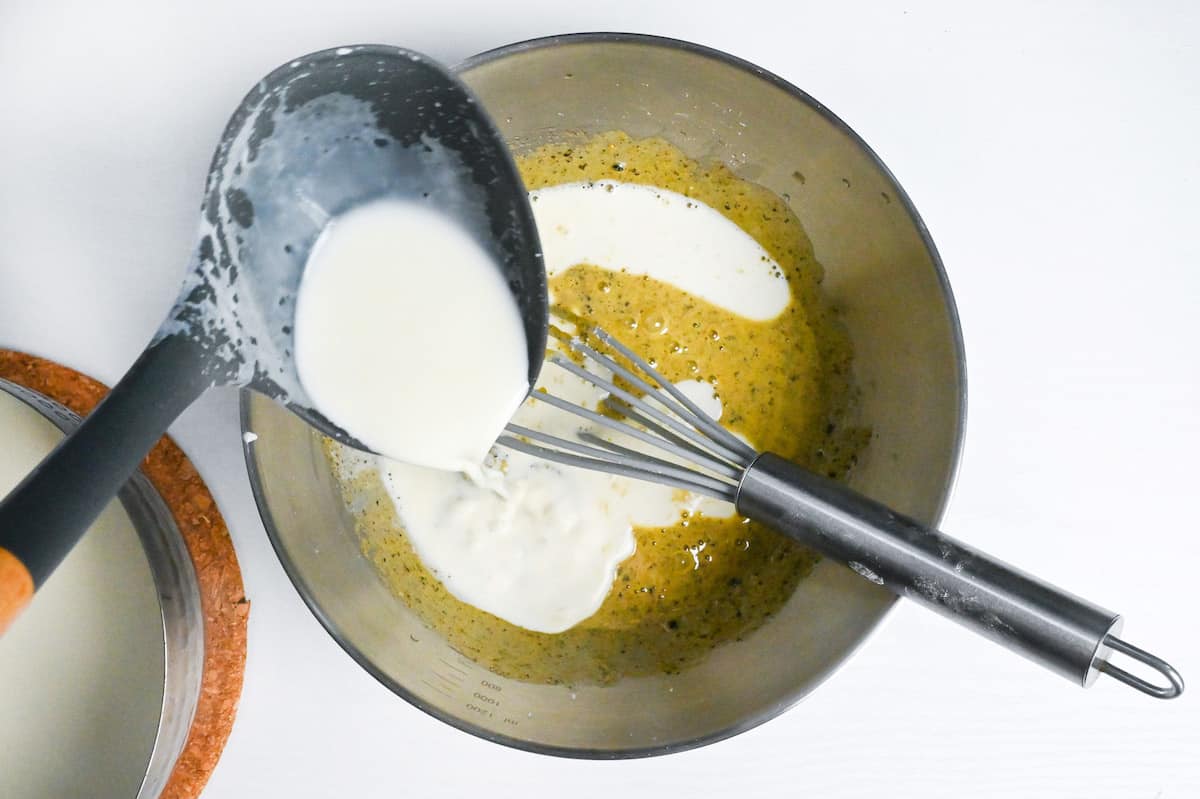
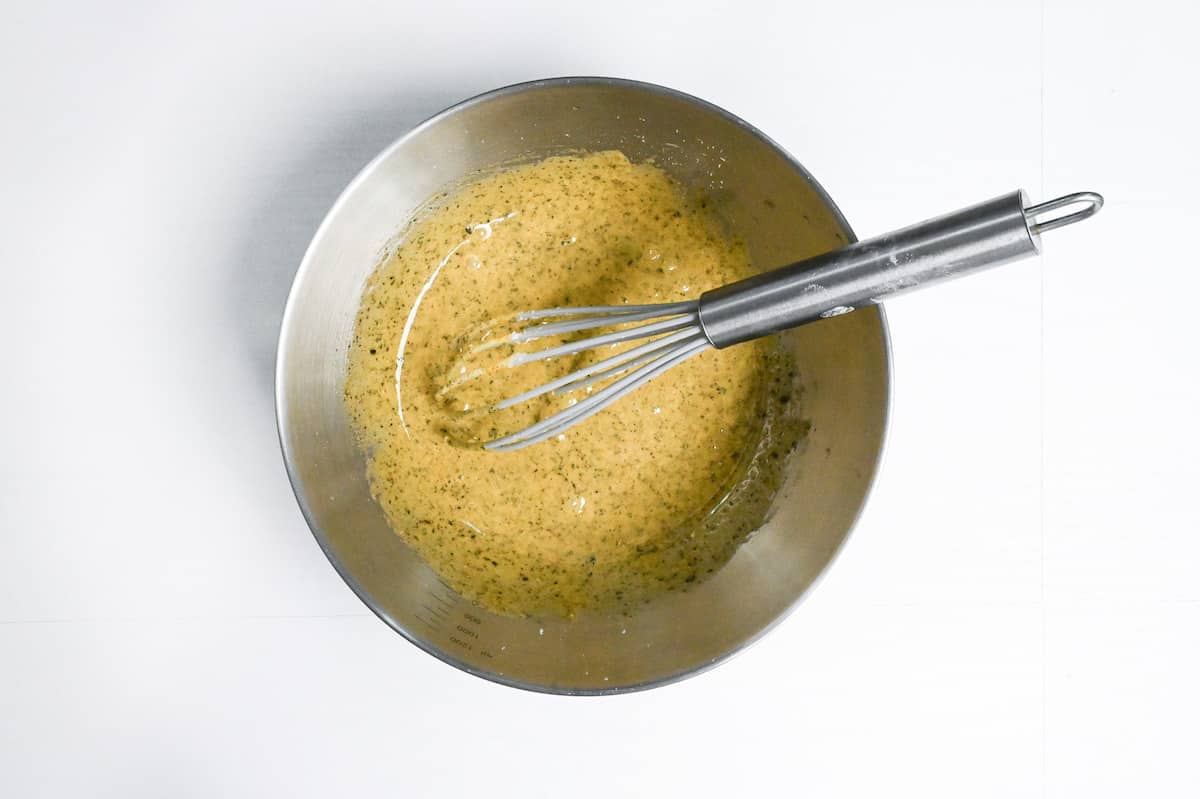
Temper the eggs by adding a ladle of the hot milk/cream mixture to the bowl and then whisk them together. This prevents the egg from cooking and making lumps in your ice cream mixture.

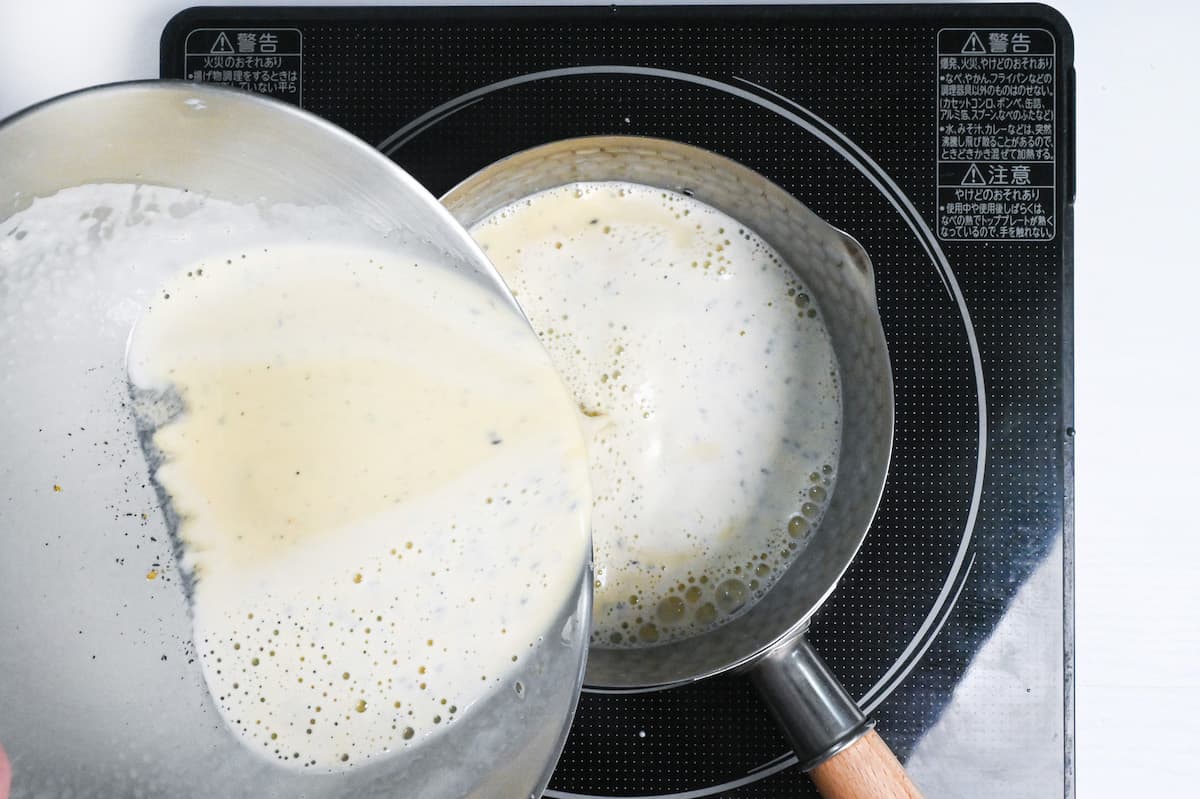
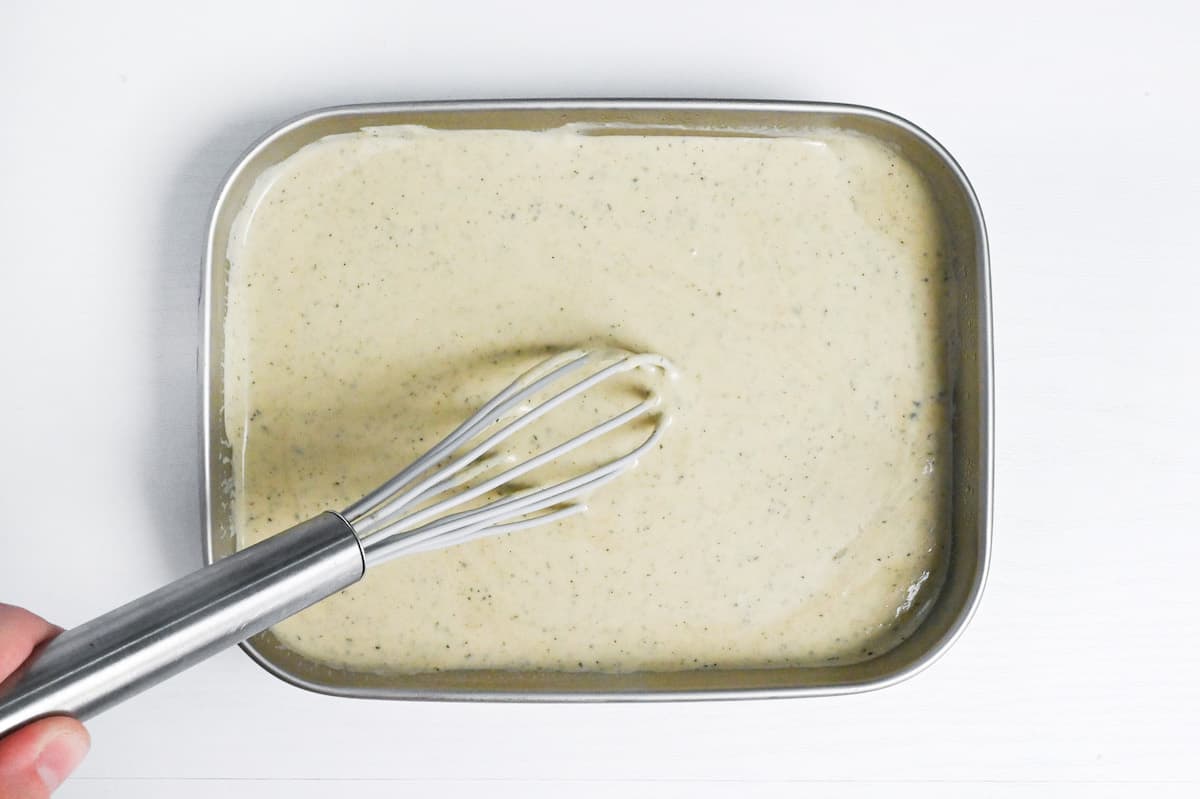
Gradually pour the rest of the milk/cream into the bowl while whisking and then pour it back into the saucepan. (For best results, wipe out the saucepan before adding it back in.)

Place the pan over a low/medium-low setting and heat it again. Stir continuously until the mixture thickens. Once it becomes like a thick custard and coats the back of a spoon, remove the pan from the heat.
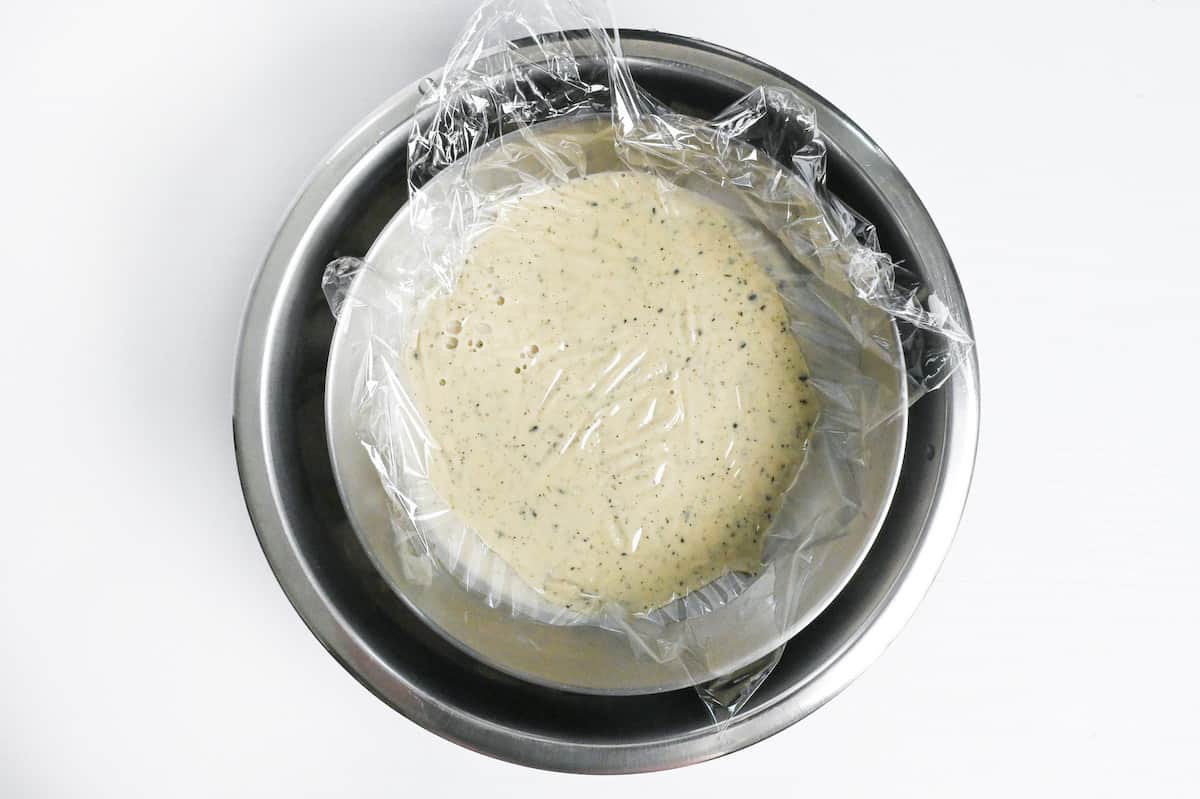
Transfer it to a heatproof bowl (preferably metal) and cover the top with plastic wrap touching the surface. (This is to prevent a skin from forming.) I recommend placing the bowl in an ice bath to speed up the cooling process, however if you are using a glass bowl, avoid sudden temperature changes as this can make the glass crack.
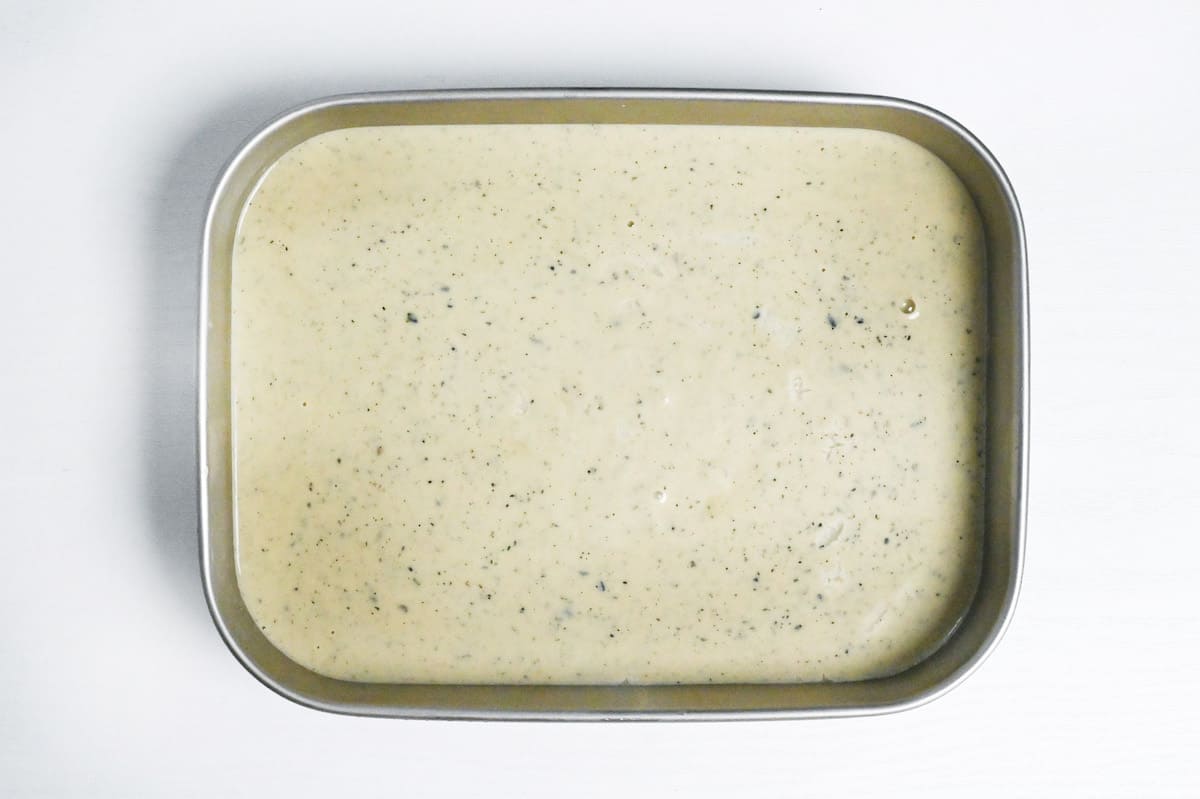
Once the mixture is cool to the touch, transfer to your chilled container and place the lid on. Store the ice cream in the freezer for 30 minutes.
To prevent ice crystals from forming, it is necessary to mix the ice cream as much as possible. I find churning every 30-45 minutes for 3-4 hours is enough to make a smooth homemade ice cream.
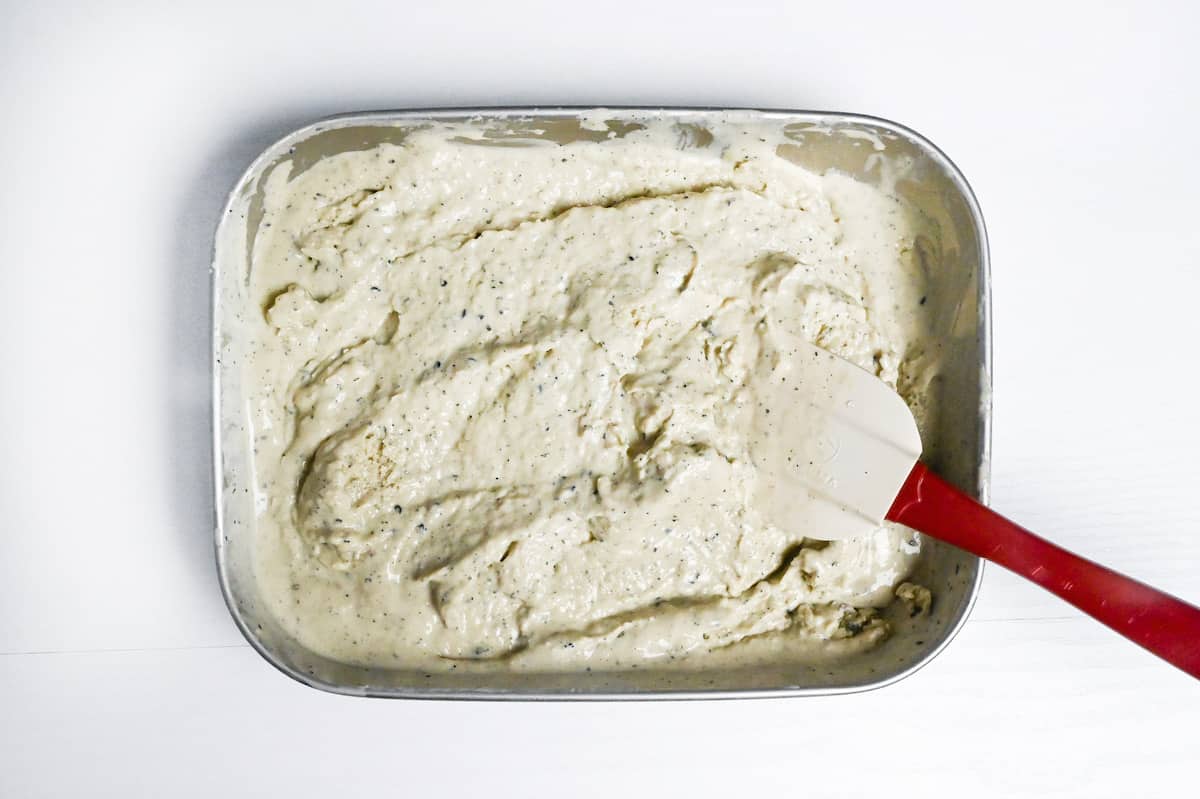
In the early stages, I use a whisk, but as it firms up and gets harder to mix, I recommend switching to a spatula. Make sure to scrape the edges and mix them into the middle!
Once you’ve churned it about 6 times, leave to freeze fully for another 2-3 hours before serving. This is just an estimate and it could take longer depending on the season or your freezer settings.
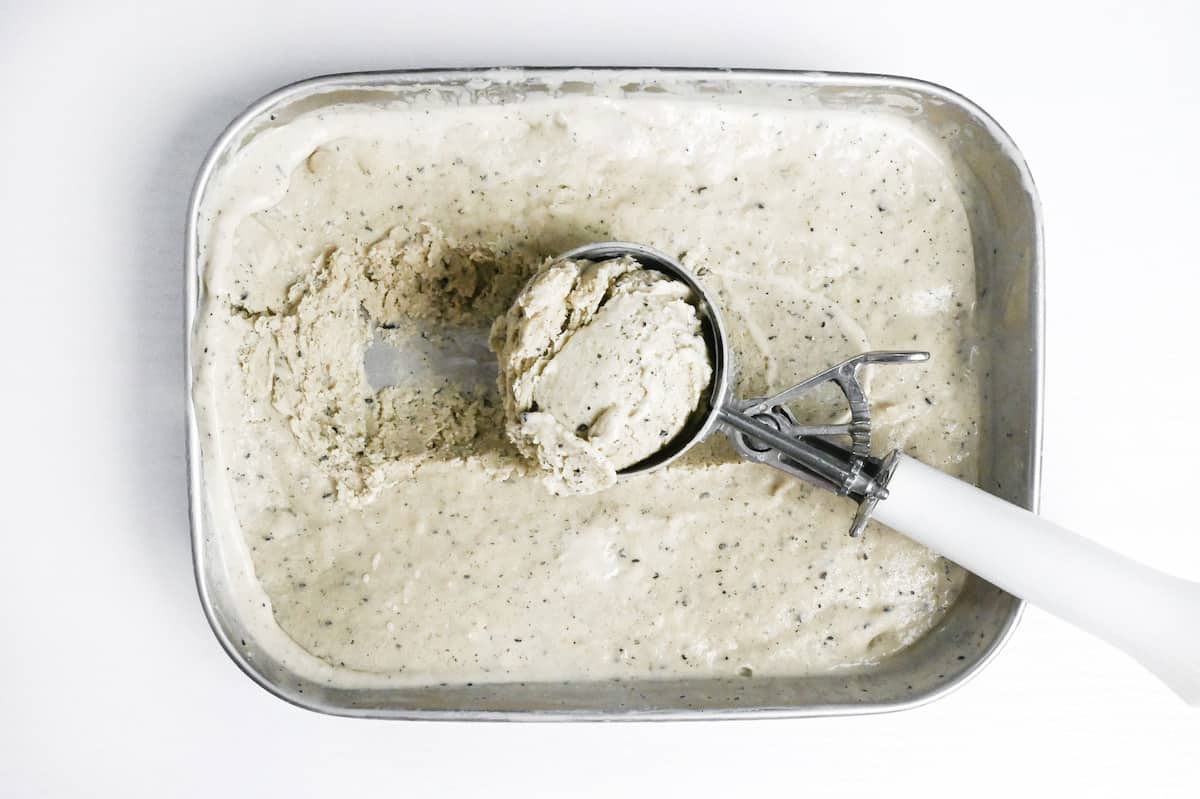
Once it’s fully frozen, you might need to leave it on the counter for 5-10 minutes so that it is soft enough to scoop.
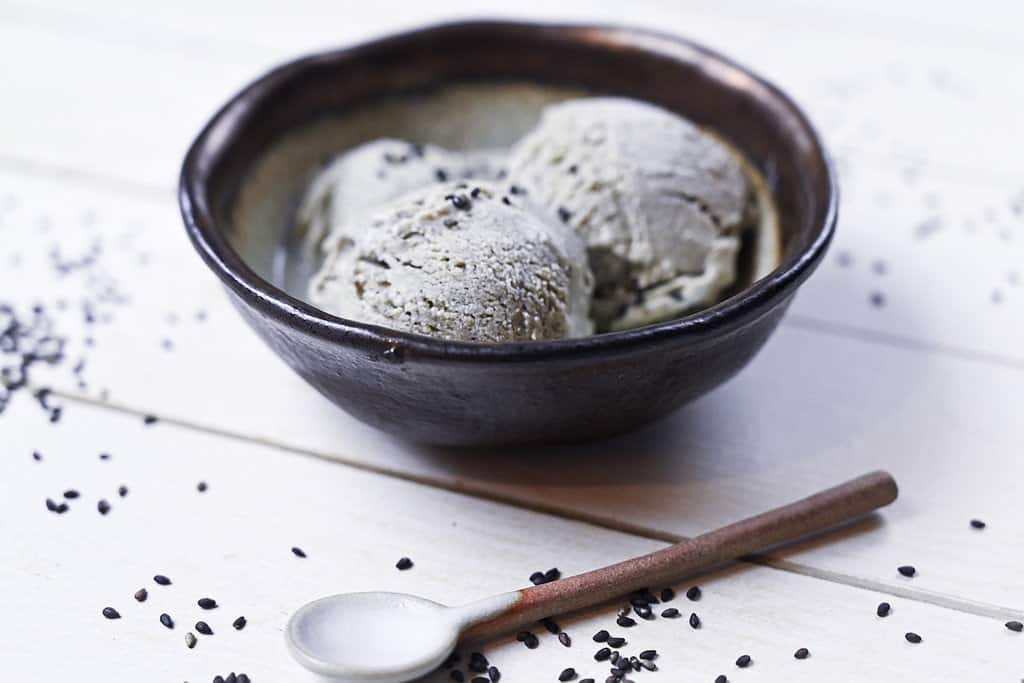
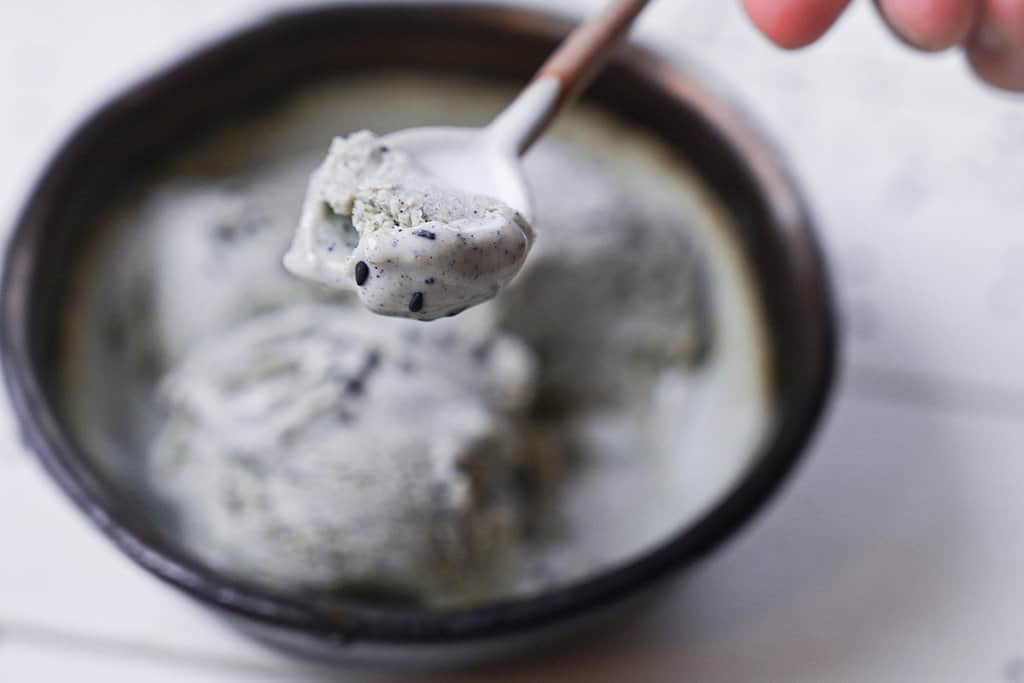
Enjoy your rich and creamy homemade black sesame ice cream!
Jump to Full Recipe Measurements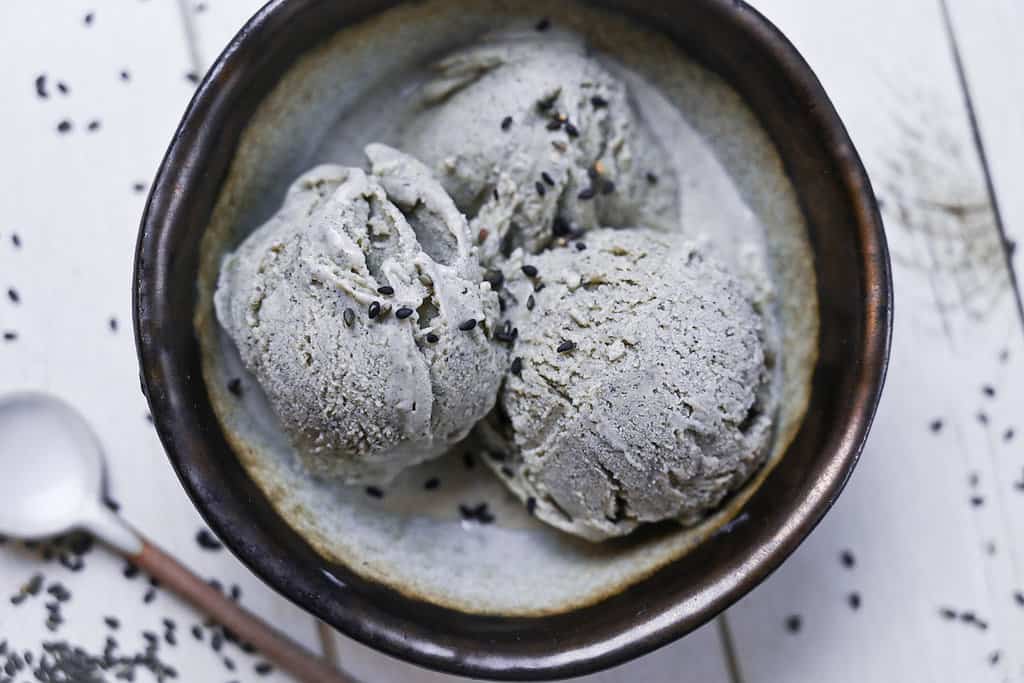
Tips & Tricks
Making homemade ice cream is fun and easy, but it takes time. Here are a few tricks I use to speed up the process as much as possible.
- Use a metal container – Metals conduct heat and this makes steel containers ideal for freezing ice cream because the container gets extra cold! You will find the ice cream at the edges and base of the container freeze faster so if you mix well, your ice cream will be ready in no time! I bought my containers in Japan but I found these similar ones on Amazon with leakproof lids.
- Freeze your container before you start – this will kickstart the freezing process when you add the mixture.
- Use a wide container – the higher surface area helps it freeze faster. Tall containers take longer.
- Heat slowly – Heat the milk and cream mixture slowly over a low or medium-low heat. This will prevent splitting or curdling and make it less likely to scold the milk.
- Don’t heat over 70°C (158°F)– Higher than this will scold the milk and give it an unpleasant flavor.
- Cool the mixture thoroughly – if you add hot ice cream mixture straight to the chilled container, it’s not going to be chilled anymore. You can speed up the cooling process by mixing or placing the bowl in an ice bath.
- Use a timer – I always set a timer so that I don’t forget to churn.
- Churn as much as possible – Churning breaks up the ice crystals and makes the ice cream smooth. I recommend churning 6 times every 30-45 minutes, but if you can churn more than that, please do! The more you churn, the smoother your ice cream will be.
How to Store
Homemade ice cream is best eaten the first few days after it is made when the flavors have settled but they’re still fresh. It is recommended to store in an airtight container and consume within 2 weeks for the best flavor and texture.
FAQ
Black sesame seeds have a stronger flavor than white sesame seeds. The taste is nutty and slightly bitter.
Of course! It’s the perfect balance of nutty, creamy and sweet. Black sesame ice cream ticks all the boxes!
The strong nutty taste of black sesame can be compared to peanut butter, but the overall flavor is different.
I hope you enjoy this Black Sesame Ice Cream recipe! If you try it out, I’d really appreciate it if you could spare a moment to let me know what you thought by giving a review and star rating in the comments below. It’s also helpful to share any adjustments you made to the recipe with our other readers. Thank you!
More Sweets Recipes
- Matcha Ice Cream (Green Tea)
- Hojicha Ice Cream (Roasted Green Tea)
- Silky Japanese Custard Purin
Want more inspiration? Explore my Japanese Dessert Roundup Post for a carefully selected collection of tasty recipe ideas to spark your next tea party!

Black Sesame Ice Cream

Ingredients
Black sesame paste
- 1 ½ tbsp black sesame seeds
- ½ tbsp freshly boiled water
- ½ tbsp sugar
Ice Cream
- 200 ml whole milk
- 200 ml heavy cream 35% milk fat or higher
- ¼ tsp vanilla essence
- 2 pasteurized egg yolk
- 70 g sugar
- 1 tsp cornstarch
- ice cubes to speed up cooling, optional
The ingredient brands and tools I trust are in my Japanese pantry guide and my cooking tools guide.
Can’t find certain Japanese ingredients? See my substitution guide here.
Instructions
Black Sesame Paste
- Before starting, place a metal container in the freezer for storing the ice cream later.
- Pour 1 ½ tbsp black sesame seeds into a dry pan and toast over a medium-low heat until fragrant. Stir or shake the pan continuously to prevent burning.

- Grind using a mortar and pestle until it becomes a fine powder.
- Once smooth, transfer to a small bowl and add ½ tbsp sugar and ½ tbsp freshly boiled water. Mix until it forms a paste. (Add a little more water if necessary.)
Ice cream
- Add 200 ml whole milk, 200 ml heavy cream and ¼ tsp vanilla essence to a saucepan. Heat on low and mix continuously until it reaches between 60 °C (140 °F) and 70 °C (158 °F) (or until small bubbles appear around the edges of the pan). Be careful not to overheat and scold the milk. Once hot, remove the pan from the stove and set aside.
- In a heat-proof mixing bowl, add 2 pasteurized egg yolk, 70 g sugar, 1 tsp cornstarch and the black sesame paste. Mix until smooth.
- Add a few tablespoons of the hot milk/cream mixture to the bowl while whisking to temper the eggs.
- Gradually pour the rest of the milk/cream into the bowl while whisking.
- Wipe out the saucepan and pour the contents of the bowl back in.
- Return the saucepan to the stove and stir continuously over a low/medium-low heat until thickened to a custard-like consistency. Scrape the bottom from time to time to prevent burning.
- Pour the thickened mixture back into the heatproof bowl and place it in a bowl of ice to speed up the cooling down period. Cover the surface with a piece of plastic wrap to prevent a skin from forming on the top.
- Once cool to the touch, take your container from the freezer and pour the ice cream mixture inside. Cover with plastic wrap or a lid and place it in the coldest part of your freezer.
- Whisk every 30-45 minutes for 3-4 hours (6 times in total). I recommend setting a timer so you don't forget!
- Switch to a spatula when it becomes to thick to whisk.Once you've finished churning, freeze for another 2-3 hours to set fully.
- Rest on the counter 5-10 minutes before scooping.
- Enjoy!
Notes
- If you use premade black sesame paste (neri goma) instead of making your own, substitute with 2 tbsp.
- When doubling or tripling the recipe, freezing time might take longer. I recommend dividing batches into smaller containers to speed up the freezing time.
- Best eaten within 2 weeks.
Hello, do you have any black sesame bread/cake recipe easy to bake? Thank you
Hi Tram,
Unfortunately I don’t have any other black sesame recipes for now, but it’s definitely something I’ll be working on in the future!
Can we achieve the grey colour with this recipe ?
I can see that the final photo of the pictorial representation is beige or cream in colour and not grey as soon in the cover image.
Can we achieve the grey colour with this recipe ?
I can see that the final photo of the pictorial representation is beige or cream in colour and not grey as soon in the cover image.
Hi!
The final pictures and the process pictures are different batches using the same recipe. In the final picture the yolks were paler which is why the ice cream looks more gray, and the process pictures show a more beige color is from using more vibrant egg yolks. The taste would be the same, but the color changes depending on your ingredients. It’s a delicious recipe though, so I hope you give it a try!
Yuto
This is the best black sesame ice cream I’ve ever had!
Hi Siothrún,
Thank you! Happy you enjoyed it!
Yuto